Quantcast
Channel: Sew Dixie Lou.
Viewing all 85 articles
Browse latest View live

The Winter Shirt Dress: McCalls 6600

$
0
0
It's Minerva Project time and I'm kind of in love with my latest make.

It's safe to say we've skipped merrily into Autumn - does anyone else love this season as much as me? Who doesn't love all the beautiful colours of the leaves and that crisp smell in the air to say that Winter and....CHRISTMAS...is on the way? So, without further a do it's definitely time to break out the fall sewing.

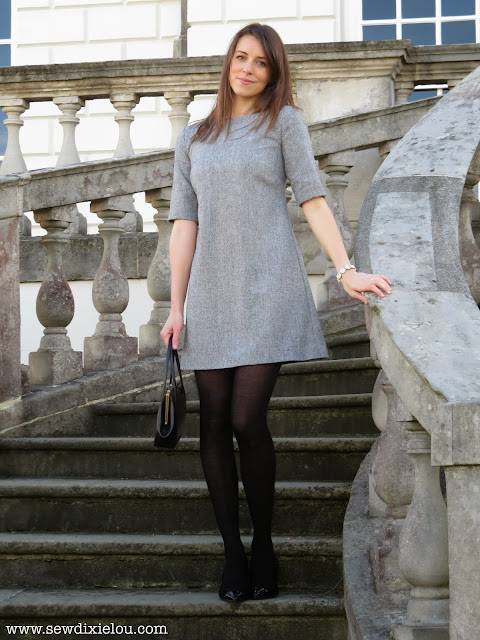
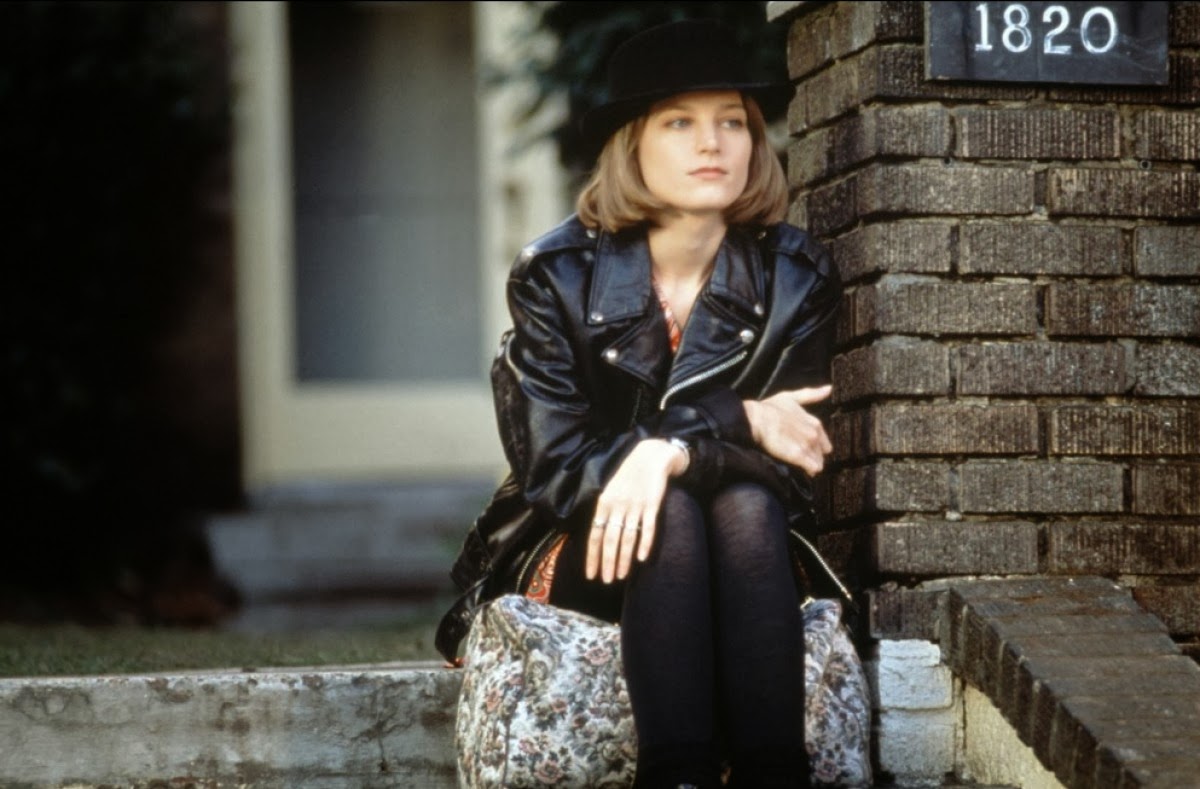
For my latest Minerva project I wanted another shirt dress. I am in love with shirt dresses. What can I say? Me and shirt dresses are going steady. Browsing through the patterns, I instantly got the hots for another McCalls version - M6600. I loved the 70s appeal of the styling, the big hat, tights and the loose fitting, casual elegance of the dress.


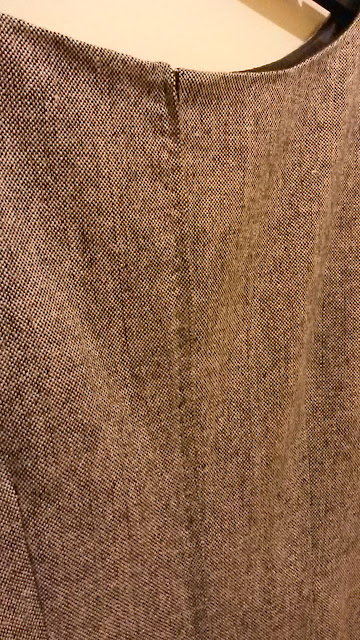
The pattern has two versions. I went for version A, which is basically a loose fitting dress with a self-tie belt. Version B incorporates an elasticated draw-cord waist. The feature I like the most is that there are only 4 buttons on the front of the shirt - the rest is a seam down to the hem. Because the dress is so roomy, you just slip it over your head and then it's up to you how much skin you want to flaunt.


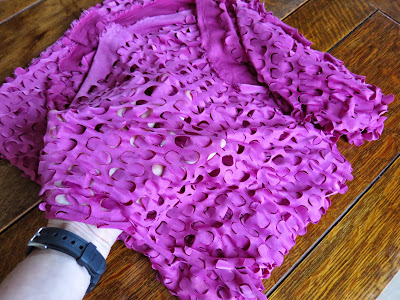
The fabric is a bit of an unusual choice for me, but I really liked it when I saw it on the Minerva website. It's viscose and features awesome swirls in bright pink, orange, white and taupe. It's so funky yet without looking too in your face.

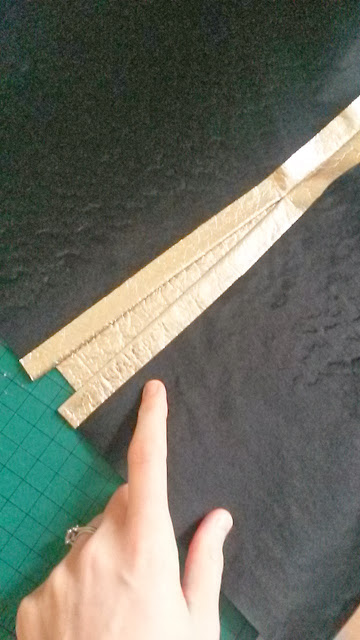
I was a little nervous working with viscose to construct a shirt collar but it was actually fine. With the right interfacing, it's pretty much trouble-free. Cutting the fabric was also straightforward, I just made sure I pinned everywhere to prevent shifting.


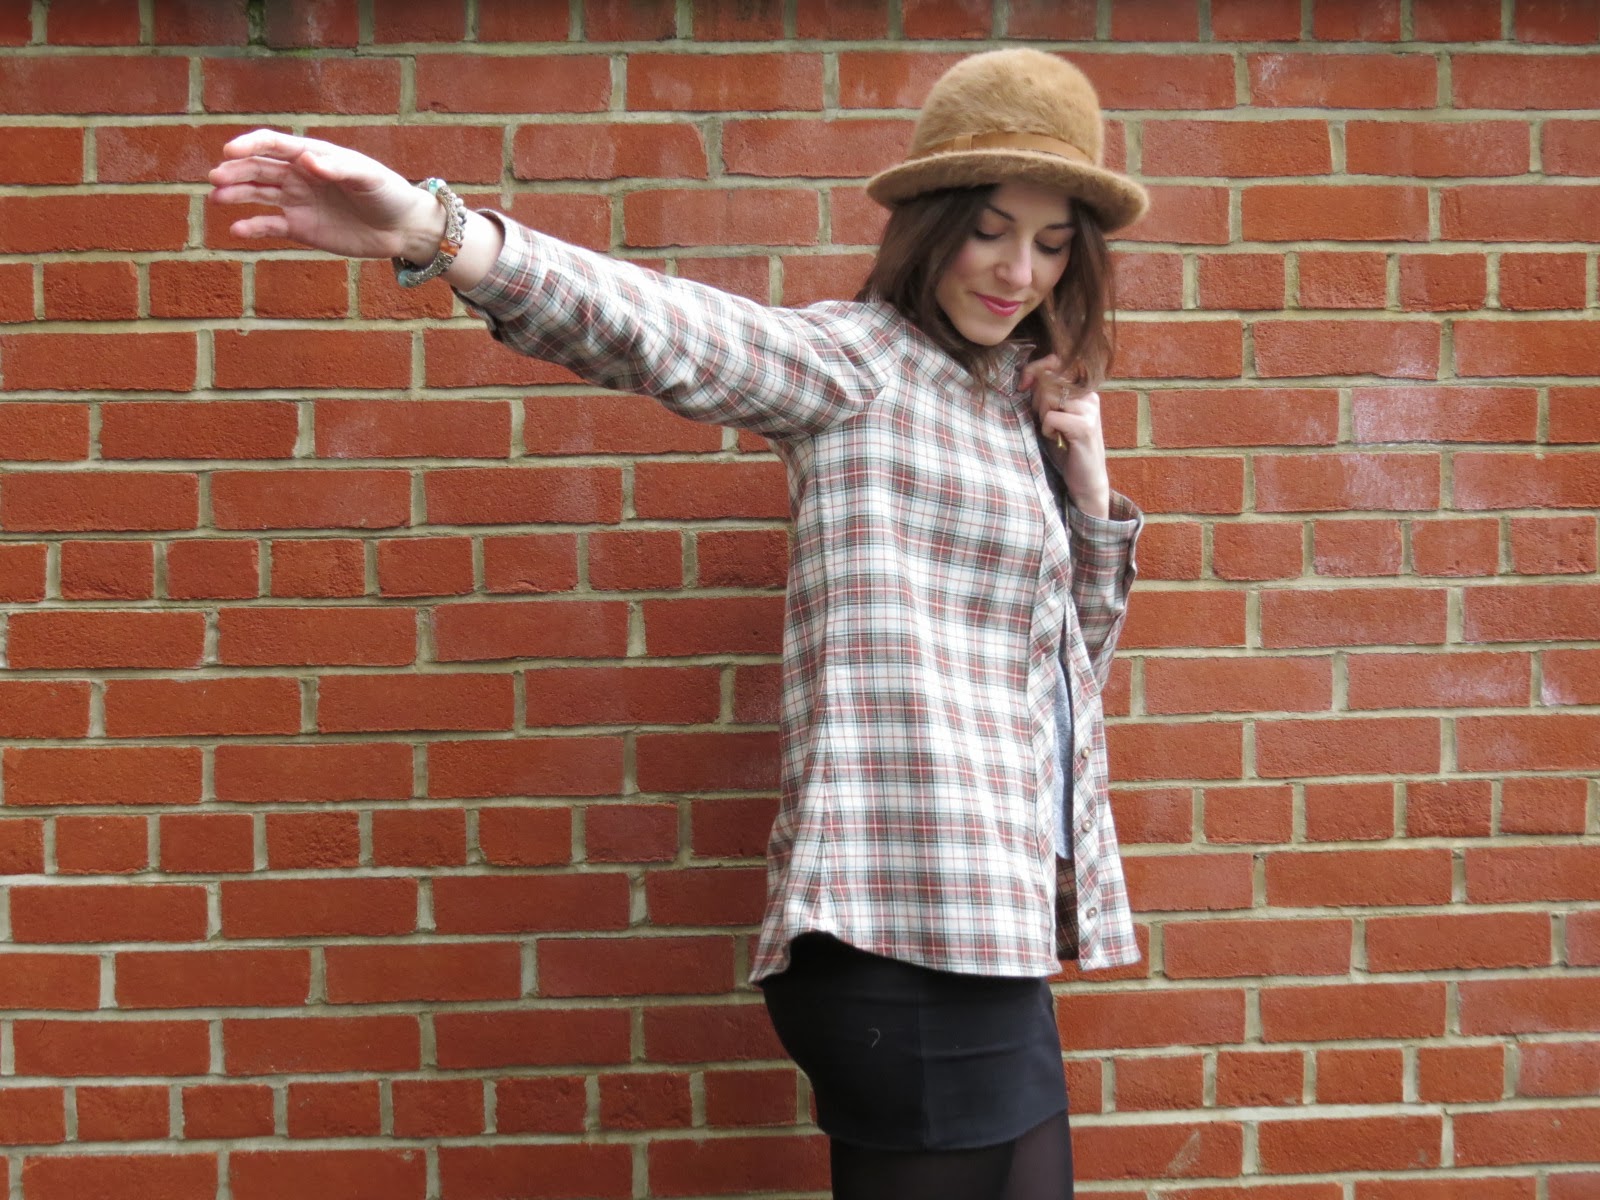
The beauty of this pattern is that it didn't require a muslin. It's designed to be loose fitting with the shaping coming from the belt. I love the 'blouson' effect around the waist. It's roomy but without looking over-sized.

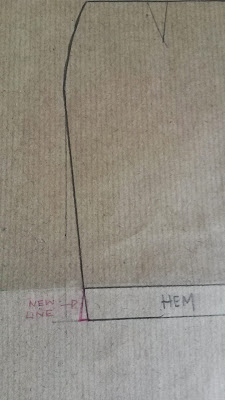
However, I did still pay attention to the flat pattern measurements and decided to cut the smallest size on the pattern - size 8. Even the 10 seemed like it would just be too big for me. I'm really pleased with this decision as the dress fits perfectly and pretty much matches the McCalls image on the pattern cover. I took off a few inches from the hem but otherwise I didn't make any alterations, and because this fabric is so light, I finished all seams by pinking. Simples!

The instructions were very easy to follow. Techniques include yoke, shirt collar and collar band, button placket/facing, cuffs and I think this would be a nice project for a beginner sewer who is looking to extend their skills.


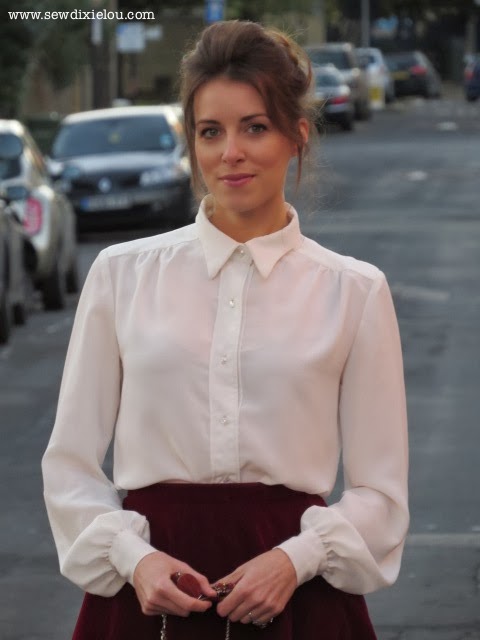
The sleeves are constructed with the seam closer to the back so that you can create a pleat and a small 'rolled-hem' placket. There is a narrow cuff, which is fastened with a button. I chose these subtle shiny black buttons, which blend in nicely to the dress.


The pleat joining the cuff gives a subtle blouson effect to the sleeve and the narrow cuff band fits snugly yet not too tight around the wrist.


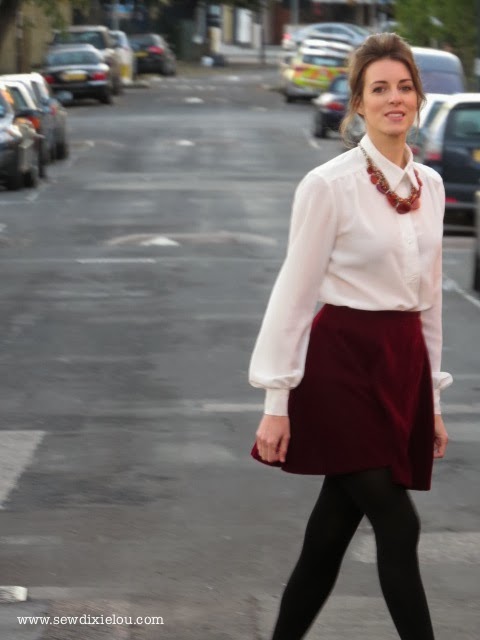
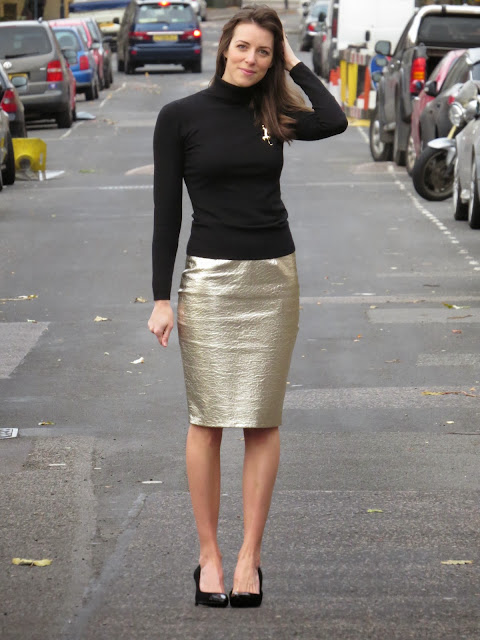
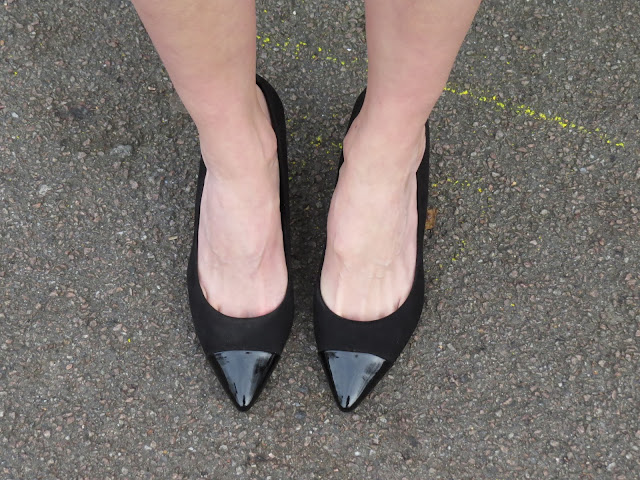
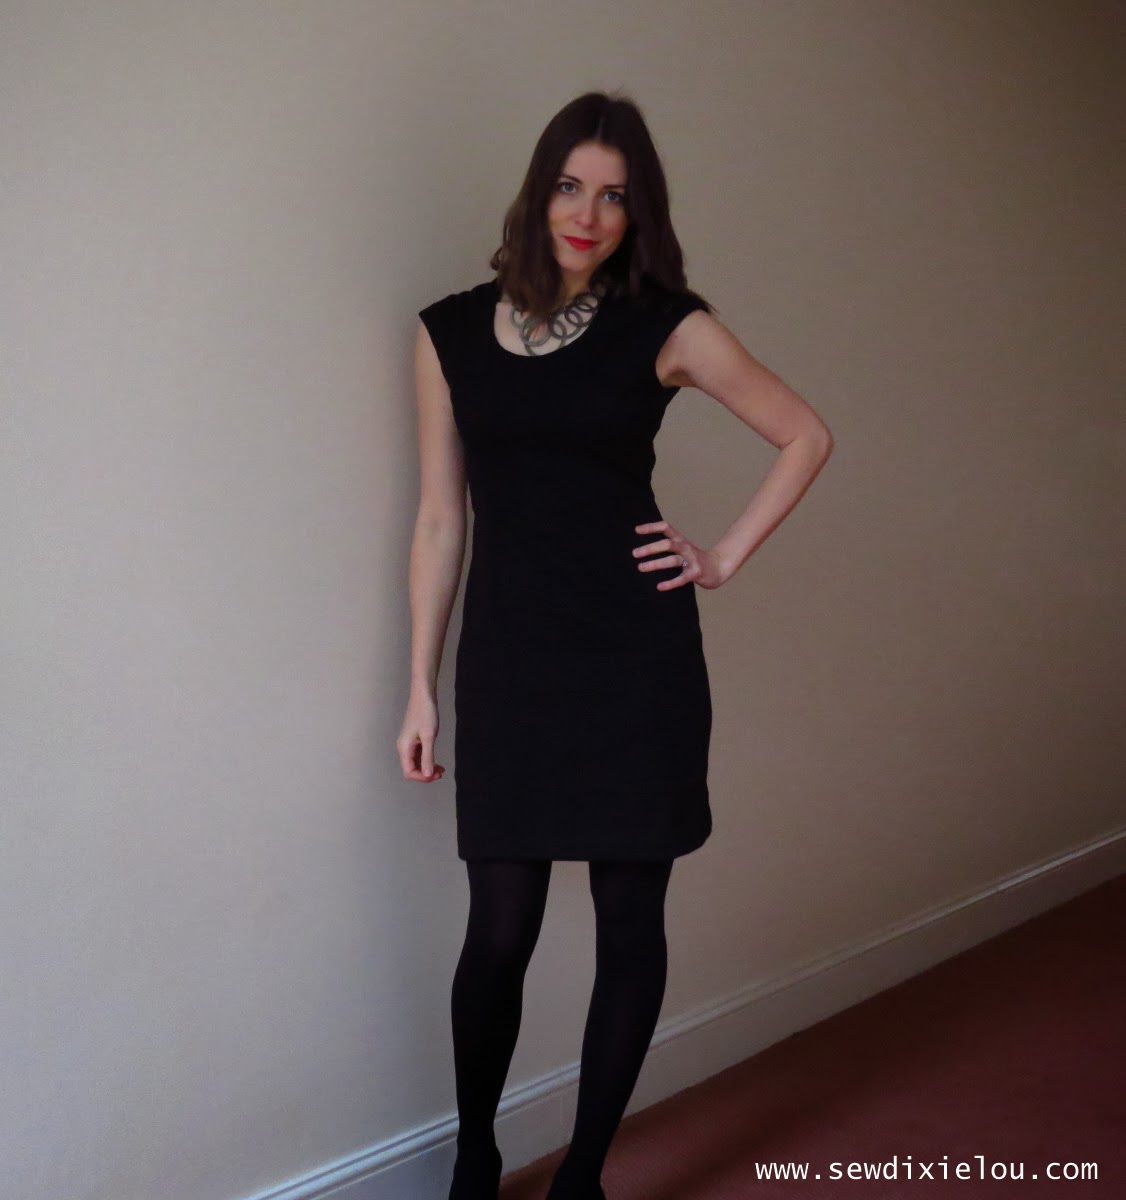
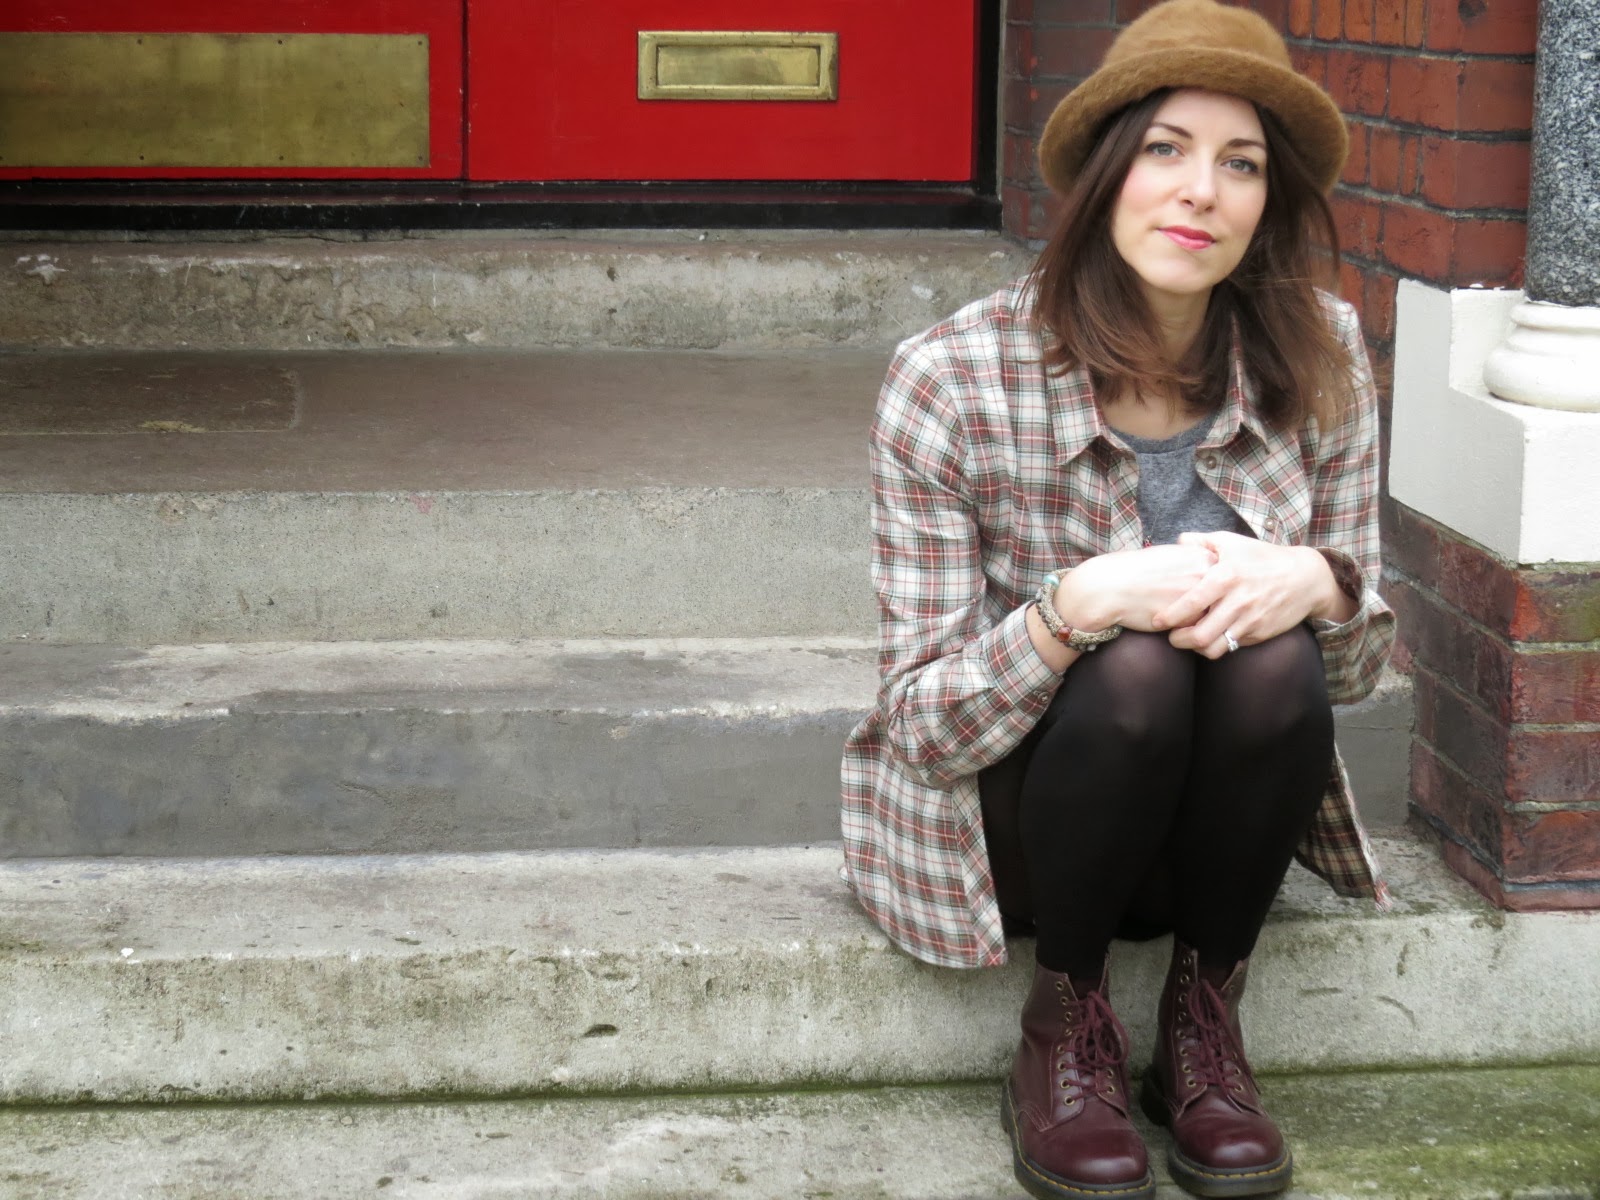
I'm wearing this dress with black bamboo tights and my winter faux-suede boots from Marks & Spencers. They have a kitten heel and are perfect for all-day wearing - bit of glamour with no pain for us big-footed girls.

If you like this pattern and fabric combo, don't forget you can get it from the Minerva Crafts website, here!


<Playlist: Winter - Rolling Stones>

She's only bloody giving it away!

$
0
0
Hey everyone!

I'm pretty excited about this post as I am announcing my first ever giveaway. Raise yo hands!

To celebrate reaching 500 followers on Twitter, I thought I'd put together a cool loot to giveaway to one lucky reader of Sew Dixie Lou. To help me out, the brilliant folk at Minerva Crafts have kindly donated a huge bundle of fabric, and when I say huge, I really mean HUGE.

Take a look at this booty!

Houndstooth and checked knit, and a beautiful, sequinned sheer fabric


 More knits and a deep navy corduroy 


 Love this trio of stretchy goodness! 


 This is just beautiful: it feels like organza


 How fun is this? 


The blue is a knit and the smaller piece is a sheer fabric that
I think would make a lovely panel in a garment

And, that's not all! As a gift from me, I have bought an extra copy of this book to add to the fabric bundle. I own this myself, but I have used it so many times and find it invaluable. The pictures are super helpful and it's a great resource for all sewers looking to perfect the fit of their makes. So, you'll not only be receiving the fabric stash but also a brand new copy of this too, signed by me (kidding!).


The Complete Photo Guide to Pattern Fitting is a comprehensive how-to book about altering commercial patterns to customize the fit to one’s own body before cutting out fabric and sewing the garment. Poor fit is the number one reason many sewers get discouraged with garment sewing. Author Sarah Veblen guides the reader through the steps of sewing a muslin test garment, fine-tuning the fit by pinning the garment to mold perfectly to the wearer’s body, marking the adjustments, and then transferring those alterations to the commercial pattern. Veblen had developed this method during her career as a professional sewer and teacher and it is far more comprehensive and accurate than quick-fix flat-pattern methods in which patterns are altered using only a few body measurements. The results produce a perfectly fitting garment every time.

Unfortunately, as you can imagine the fabric and book are going to be a monster to post and so I can only offer it to UK dwellers. However, fear not my pretties overseas, also included in the Minerva Crafts stash was some gorgeous Christmas fat quarters and the prettiest reels of thread I have ever seen. I have decided to separate these from the main bundle and create a separate little prize stash for you guys abroad. Neglect has no place here, we've got to share the love! 


Not a tin of mints, but a tin of thread! Gorgeous.

So for those in the UK, you can win a whopping 13 pieces of fabric as well as a brand new copy of The Complete Photo Guide to Pattern Fitting. And, if you're outside Blighty, you can win 4 Christmas fat quarters, 5 reels of machine embroidery/quilting thread and a gorgeous Gutermann tin that includes 4 reels of polyester thread (navy, black, red and white). 

Okay, Clare, we get the picture, how do we get our hands on this goodness?

Right, there's just a few things you need to do in order to enter this giveaway.

1) First up you need to follow both myself and Minerva Crafts on Twitter, as well as tweet/retweet the
    giveaway announcement (@Clarebel79 and @MinervaFabrics) 
2) Next, leave a comment below telling me one thing you think you might make from the giveaway
    stash

Could you also please remember to tell me your country location so that I know what to enter you for.

The deadline to enter is 22nd November!

Good luck everyone and big thanks to Vicki at Minerva for helping me to arrange this as well as sending such a cool stash of fabric and thread to giveaway.

Spooky sewing - the 'Happy Skulls' woven t-shirt

$
0
0
During last week's spooky festivities, I was sitting at my desk when I heard whispers from the fabric shelf. "Hey, Clareeeeeeeeeeey...". As any dumb girl in a horror movie, I didn't run straight for the front door, but instead I thought it best to head straight for the voices armed with just my french curve. At this point I'd also like to add I had perfect hair, cleavage and the pertest bum-bum - basically this:


As the whispers continued, I tip-toed closer. The room was silent bar the tinkering on a random piano. I lifted my french curve, and prodded a heap of jersey. Nothing. I mouthed "omg" and breathed in and out so that my amazing cleavage went up and down a couple of times. I took another deep breath and lifted up my precious chambray, which was quivering underneath a puddle of oxblood faux leather.

"Clareeeeyyyyyyyy.....!"

After nearly crapping myself, I exhaled a huge sigh of relief. No mini psychos in hockey masks, but my happy skulls fabric from Toronto! "Do you remember us?" Oh happy skulls, how could I ever forget you? Let's whip you up into some spooky goodness straight away!


I bought this awesome chiffon when I was in Toronto in the summer. I think it was about $6 p/y and I found it while I was mooching around Designer Fabrics on Queen Street with the wonderful Catja, Andrea, Gillian and Sara at our Toronto meet-up on my birthday. Catja and I even made a great jingle, aptly named "Happy Skulls" of course, which we sung at the cash register. We're not crazy, we just really like buying fabric with smiling skulls on it!


Inspired by the lovely Fiona's awesome scout tee, I decided to draft my oven woven tee-shirt complete with cool pleats across the bust.

To achieve this, I used my basic bodice block which I lengthened, closed the bust dart to release the waist dart for a looser fit, and then added five pleats using a cut & slash method. If anyone is interested in how I did this, let me know and I will write a tutorial. These pleats can be added easily and are useful in sheer fabrics for providing extra coverage over your bust area.


This was actually my initial intention - to hide my bra and make the top more practical to wear as the fabric is very sheer - but in the end I decided to underline with an ivory white polyester I had leftover from a project a few years ago. The skulls and underlining are joined at the shoulder seams, neckline and armholes, leaving the side seams free so that the top has a flowing movement to it. The sleeves are not underlined.

Inside view: ignore the tacking stitches still in the sleeve hem!

I finished all seams with a french seam and hemmed the bodices and sleeves with a narrow hem. The neckline is finished with bias binding I made from the skull fabric. I had to experiment on scraps for ages as both fabrics had a tantrum when it came to stitching. In the end I had to go down to a 60/8 sharp needle, which resolved the kicking and screaming, and mainly the skipped stitches.


This project took a little longer than anticipated owing to the delicate fabric, french seams and trying to pleat impossibly slinky material, but for me, the outcome has been so worth it. I really love this top. It's fun and feels great against my skin. These photos were taken in Greenwich park and I'm teaming 'Happy Skulls' with my leather-look trousers from Zara and leopard print Vans.

What's one of your favourite things about Autumn right now? For me, it's LEAVES!


<Playlist: Spooky - Dusty Springfield>

Introducing The Spoolettes!

$
0
0
Some time in the summer, fuelled by spicy American food and beer, myself, Nicole, Sally and Amy created The Spoolettes.

Was ist das, I hear you ask?

Well, it's a shitastic birth of awesomeness. Granted, at the time of The Spoolettes creation, we were in the midst of some serious summer loving. I held a party at Chez Dixie Lou where a group of us, bound by the love of all things fabric and thread, drunk a crap load of cava and tequila, ate my cheese and pineapple hedgehog, and danced until my lounge floor was a soppy puddle of tuck-dancing (don't ask) and booze. Ahhh take me back there now!

Days later, Mrs Needles - a woman of class and connections - took myself, Sally and Amy for cocktails on the fifth floor of Harvey Nichols. Picture it - London skyline, evening sun, champagne cocktails and Knightsbridge. Yes, this my people, is how we roll, and most importantly this is how YOU can roll too.

Join the Spoolettes!

Okay, so it's not all drinking and living the high-life, but it is always fun AND it's not restricted to London and the UK. We love meeting up with each other, talking sewing, eating great food and checking out events - so why not organise this where you are? If you don't drink, so what, grab a juice, The Spoolettes never judge and just want you to have a good time and make even better friends. Don't like late nights, no problem, why not organise a little afternoon of fabric mooching with afternoon tea? The Spoolettes love nothing better than a vintage tea pot and some cake - okay, maybe of us have gin in our teapots, but who's looking?

Plus, by becoming a Spoolette, you'll always have someone there to stop you from taking a beautiful vintage prom dress and turning it into this:

The Spoolette sisters have your back

What do WE like to do?

Anything! Recently, a group of us went to the V&A in London to see the 1980s From Club to Catwalk Fashion exhibit, and later this month The Spoolettes are hitting Bloomsbury Bowling Alley in handmade bowling shirts. I cannot wait for this! We're then hoping to do a UK version of the Austrialian Frocktails night, so hey US, get on board too! This coming Monday, we're welcoming Amity from Lolita Patterns with a day of fabric shopping in London followed by dinner and drinks.

And, don't forget UK Spoolettes, Dolly hits London next June... perfect timing for our Dolly/Joan sewalong don't you think?

So what do YOU need to do?
There's no special criteria - this isn't Heathers or Mean Girls, just email me at clare@sewdixielou.com and I'll send you a cool little badge for your blog and hey presto! You're in the coolest worldwide gang since The Outsiders. We've also created a Facebook page that will act like a noticeboard for meet ups. If you're visiting a certain city, why not post your holiday dates and see who is around? I'll be in Toronto and Ottawa myself at Christmas so I'm hoping to meet up with my Canadian Spoolettes for sure. You ladies know who you are and expect a Spoolette badge in your inbox soon.

For Facebook, I'm going to invite some international sewers to sign up as admin for their respective countries - if anyone is interested in undertaking this role, email me. Once I get the required 25 likes on the page, I'll make the Facebook url known.

Since the big London meet up back in April, organised by the amazing Rachel, I have met some truly wonderful people who I now value as great friends. This is, most importantly, what being a Spoolette is and we hope to have you on board this love boat.

Minerva Blogger Network: Viva la velvet

$
0
0
Back when I was choosing my 'Winter' collection of Minerva fabrics for the blogger network, I got the big idea to work with velvet. I was dazzled and very much in love with the jewel-like colours adorning the A/W 13 fashion shows, my particular favourite being the deep red, wine velvet as seen in Diane Von Furstenburg and Ralph Lauren's collections.

I have only worked with velvet once before on a refashion project and so, for the pattern, I wanted to keep things simple. My vision was a flared mini skirt that would both work with the drape of the velvet and be practical for a day-to-night look. The closest match was this skirt by Salme Sewing Patterns.


One of the great things about Minerva Fabrics is the customer service. I emailed Vicki with a link to the pattern and a description of what I was looking for, asking her which velvet in their range would work best with this pattern. She sent me a Polyester Velvet Velour in a sumptuous wine colour and I fell in love instantly. It  has amazing drape and feels like a little bit of luxury on my person.


Before starting the project I made sure I researched working with velvet. I found this great link, which has advice about pre-treating, cutting, stitching and pressing your fabric.

Stop. Think. Velvet!
The first thing to do is sit down, rest and tell yourself this is no ordinary fabric. This is velvet. Once you've picked yourself up off the floor, you can then wash your velvet. As the article suggests, it's good to pre-treat in the manner that you intend to clean your garment. I didn't want to be making regular trips to the dry cleaners for such a small skirt, so I took the plunge and pre-washed the fabric on a cold wash. Relax, people, it was fine!


Next, you need to think about nap. No, wake up, I mean your velvet's pile (snigger)! Velvet has a defined pile which, like satin's shine, can look very different in opposite directions. For a simple pattern such as this skirt, it's not a headache at all, but it's something to bear in mind for bigger projects. You may need to order more fabric in order to position your pattern pieces so that they are cut with the same nap. I once made a bias cut evening gown in satin and nearly self-combusted.

Speaking of cutting, ALWAYS cut velvet with a single layer of fabric and if you can, use serrated scissors. That pile is a pesky thing and makes cutting nigh on impossible on the fold. For this pattern all I had to do was mirror the front pattern piece to create one big front skirt pattern. The back pieces are also cut separately on a single layer - make sure you cut those even and completely on grain. This pattern does not include seam allowances. The instructions recommend adding 3/8" but I think it would be better to add 5/8" because the velvet will fray so you may want to finish the seams using a different method - more of that later.

My, 'always cut on a single layer' face

Next up stitching. Okay, yes this is a more sensitive operation than with other fabrics, but it's good fun learning to work with a new fabric type, and Minerva's velvet is very sweet and friendly to work with. Trust me.

Because this skirt is cut on the bias you need to stabilise those bias seams. One website suggests adhesive spray, but after trying this on a scrap I wasn't convinced. Even when it dries, it pulls the pile off and makes it impossible to finish the seam properly. Instead, I opted for my old friend silk organza. I cut long strips and basted them to the bias seams, then stitched the seams with a walking foot using looser tension and pressure settings. No puckering or moving. Bazinga!

Silk organza basted to the wrong side of the bias 
seams before pinning and stitching

Now comes pressing. Fortunately for me, I have a hot line to the world's sewing supremo Mrs Bee who kindly informed me to use a nice fluffy towel under my pile (double snigger) when pressing. To get nice crisp seams without ruining your velvet (and yes, you'll ruin it with no point of return) you place a towel under the right side of the velvet, hover your iron 1/2" over the seam and simply steam it. Using a scrap piece of fabric or your finger if it's made of steel, gently finger-crease the seam open. You may have to do this a few times, but it really works and gives you a lovely clean seam! To finish the seams you can bind them Hong Kong style or serge. I have left my pinked, but I am not sure how long they will last. I hated the effect of zig zagging and over-locking just didn't work on my seams.

Another important tip for this pattern is to stay-stitch the waist edge of the front and back so that it doesn't stretch. Just do this with a longer stitch length and your walking foot.

When interfacing the waist band do not use fusible interfacing. Most advice suggests it will not melt properly onto the back of the velvet - and again, in my opinion, the less pressing you do with velvet the better. I used a medium sew-in interfacing which worked a treat. Once you have stitched the waistband, grade the seam allowance because otherwise it will be a bit of a sandwich when you come to finishing that band on the inside.


I know you want to ask me about the zip, but you're scared of what I might tell you. It's okay, it's not that bad! The best thing to do is FIRST do not cut the Salme pattern as it is with the extended zip seam. I increased the whole seam allowance (from waist to hem) by 1", then you don't have that funny right angle that reverts back to the 3/8" seam to contend with.

SECOND, hand pick that zip! This for me, was the only thing I was going to attempt zip wise. There was no way I was inserting a concealed zipper into velvet using my machine. My sanity was at stake and it's fragile at the best of times. So, I prepared the zip seam, prepared my thread with wax and hand picked it in. It looks great, the waist seams align perfectly and I am smiling normally and not maniacally.

Hemming is also not a problem. I didn't follow Salme's instructions but instead hemmed by folding over roughly 1/2", basting, folding over again and catch-stitched the hem in place. Initially I was going to bind the hem but I didn't have enough bias binding for this. Boo.


I'm really pleased with this skirt and it's perfect for this season as well as upcoming Christmas festivities! I just realised that I am channeling a sexy little Mrs Claus in this ensemble. My shirt by the way is also handmade using a self-drafted pattern. I haven't worn it in forever as I lost some buttons, but  I replaced them weekend with super cute plastic diamante-effect hearts.


If you've not worked with velvet before, give this a go! Minerva’s velvet is a great introduction to this type of fabric and it’s easy to work with – and it’s only £5.99 p/m, which means you can have an on trend look for the Christmas season for minimal cost. Plus if you like what I have made, you can buy my kit here! I'll be wearing my skirt with jumpers, denim shirts and t-shirts. It's pretty versatile depending on your styling.

And we have a winner! My Big Giveaway Results...

$
0
0
Super pleased to announce the winner of my big giveaway.

Just to remind you, up for grabs was a MASSIVE bundle of fabric kindly donated by Minerva Crafts as well as a brand new copy of The Complete Photo Guide to Fitting, kindly donated by moi! Oh and some lovely Christmas fat quarters and thread for a lucky overseas winner.

I used a random number generator thingy-me-bob on the internet to pick a winner and....

<drum roll please....oh thanks royalist kitty whoever you are>


Congratulations, Marylou!


You are the winner of all that lovely fabric and the book! You didn't say if you were in the UK...hope you are, but please email me at clare@sewdixielou.com with your address and I'll post all this amazingness to you this week.

And now for our overseas winner!... Kitty? Kitty? Oh... he's gone. But.....


Congratulations, Gillian!

Yey, my lovely friend you won! (A total honest draw, I promise). Gillian, I'd bring your stuff over when I am in Canada, but as it's Christmas fabric, will seem pointless by the time I see you, so please email your address and I'll post this off to you asap so you can get crafting some Xmas goodies. 

Thanks to everyone who entered! Only another 354 followers to go until I reach 1000...god knows what I'll giveaway then ;) 

xx 

Down in the alley: The Spoolettes go bowling!

$
0
0
Just incase you left the planet last weekend, The Spoolettes hit the alleys and went bowling!

This was a long time planning. but we finally got a date down that we could all make and one that gave us plenty of time to make our shirts. Yeah, you read that right, all TWELVE of us made our own bowling shirts and I can't begin to tell you how impressed I was with the results.

For me, I toyed with the idea of which pattern to use but in the end I decided to draft my own. I was a little nervous as I hadn't actually worked with this kind of camp collar before, but it was all pretty straight forward and mega points go to camp collars for not having shitty collar stands to deal with. Yey!

I chose a hot pink cotton poplin from eBay and here's how it turned out. Excuse the toilet selfie.

What you can't see is my Dolly for President badge!

To break up all the pinkness, I added some animal print ribbon to the sleeves because as you know I love me some animal print! The thought of embroidery did not last long in my little head. I thought of all the hours I'd spend doing that versus making something else and decided to see if I could make someone else do it for me. Oh yes, eBay you deliver again! I found a great seller who makes these gas station style name badges, and ordered a 'Dixie Lou' straight away.

Simply iron on and bowl, baby!

Here's a better pic of the finished article and one that isn't in a toilet (actually at this point it still needed buttons!).

That collar looks pretty camp to me

So, that was my shirt for the big event. I loved making it; I loved the challenge and I got to test my drafting skills with something new. So it was a winner all round for me.

The bowling itself was one of the best night's out I've had in ages. I love the Spoolettes so much and it makes me so happy to know I have found such a wonderful group of friends through sewing. Seriously, I'm glowing just writing this.

A few of us met up in a pub to begin with. Here's Alison, Kathryn, Sally, me and Fiona. Check out those shirts! Kathryn's is actually made out of a galaxy duvet cover. Genius! Sally's is another incredible refashion, Alison was displaying some really badass embroidery while Fiona was super cute in her top from a vintage pattern. Adorable!


At the lanes, we grabbed our drinks (who are the Spoolettes without a drink in their hand) and started nailing those pins. Okay, well, some of us hit the pins and some of us hit the gutter, but seriously, who would Dixie Lou be without heading for the gutter, right Mrs Bee? ;)

We really had the best time. I cannot wait to go again as I want to decorate the back of my shirt. I ran out of time and inspiration for this and I hang my head shamefully. But, fear not, Spoolettes, I gots me some ideas cooking.

 Yeah, Spoolettes bowling shoes shot!

 Rehanon looking more fabulous than fabulous

 I would

Oh Palma Cristal you drink of bowling champions 

 Sally showing true bowling form

 Me, Kathryn and Mrs Needles

Alison perfecting her bowling stance 

The winner! 

The Dude abides. Kathryn drinking a white Russian

 Dinner in Ray's Diner. Thanks Ray for my yummy 
veggie burger and hard shake! Peanut butter and whiskey if anyone's asking.

This made me so happy. Oh Don, you're always trying to get with me, 
even when I'm bowling 

Sally kindly sent me these next photos and they crack me up. It looks like I like to inhale my beer!


For our next event, we're planning a posh frocktails night and I'm pretty excited! Head over to our Facebook page if you want to join in on future events with the coolest girls in town. 

If you talk in your sleep don't mention my name: the Presley Pencil Skirt

$
0
0
Although I've been a bit absent of these parts for a while, this little Christmas elf has been beavering away... be it work, sewing or drinking cocktails in Soho. I have been putting in the time people!

One of my favourite makes has happened though and I am so in love, even my quinoa porridge tastes good this morning. So, without further ado, I introduce you to the Presley Pencil Skirt.


Man, I love this and it was so quick to make. You could knock one up well within an evening.

I first saw this fabric while out on a Spoolettes outing, meeting Amity from Lolita Patterns. After dragging Sally around Regent Street and Oxford Street in search of the holy grail of burgundy velvet ties (long story) we met up with the other girls and proceeded to do what we do best: fabric shop and drink cocktails. Somewhere between the two, Sally and I fell in love with faux gold leather fabric in The Cloth House and we knew it had to be a gold pencil skirt as blogged by the awesome Cotton and Curls. The fabric was £25 p/m but I only needed half as there is no grain so you can squeeze out your front and back skirt blocks easily.

The gold I chose is this lovely white gold distressed faux leather. It's a beauty.


To make this up, I used my basic skirt block and tapered it into a pencil skirt at the bottom. If you're adapting a skirt pattern to a pencil skirt, always remember to angle out your hem allowance so that when you go to fold the hem up, the circumference of the hem matches the circumference of the skirt. Make sense? No? Okay here's what I mean:


The first pic shows the original line and hem allowance. The second pic shows the hem allowance folded under the pattern so that you can trace the skirt line (trace just your hem allowance). The third pic shows the hem unfolded and the tracing marks on the hem allowance. Notice how it comes out at an angle to match the skirt? You'll then have a new cutting line. You do this so that when you come to hem your skirt, the circumference of the hem matches the skirt. In other words, because the hem tapers down the circumference gets smaller which causes problems when you try to fold it up and hem - there will not be enough fabric to sit nice and flush.


To stitch this baby together I first tried a standard needle and polyester thread and it worked fine. I stitched the side seams, darts and back seam from slit up to the zipper point. My warning here is be sure of your fit. Definitely make a muslin first or use a pattern you're really happy with. This type of fabric will not allow you to unpick as holes are permanent. Yep, not cool. So you have to be sure as you can only taper in not out - you have been warned.

Next, I inserted an invisible zipper, which really wasn't a problem at all. I pressed my seam allowance gently using my organza pressing cloth and once I had that crease the rest was straight forward. You can press all the other seams in this way too.

Now for the cool part - I glued the hem and waistband! This fabric has a nice black silky backing and because of the fit, I didn't bother lining it. Instead, I grabbed some super glue and got sticking.

Back slit after being glued

This meant the project was done in a jiffy and I could wear it for Christmas drinks with my colleagues on Monday. We went for a delicious Moroccan meal at Momo's and then on for cocktails at Bob Bob Ricard in Soho where I discovered my new favourite drink - salted chocolate martinis. Oh my!


To finish my outfit, I teamed this skirt with a new black roll neck from Phase Eight and black heels from Marks & Spencer's, which I am crazy about. Not only are they vegan but they are just the right height for me and so comfortable. And let's not forget my vintage panther brooch. Elvis is smiling upon me.


So, that's my latest make and something special for this season. What glitzy things are you making to rock around the Christmas tree?

<Playlist: If You Talk in Your Sleep - Elvis Presley>

Sewing up Christmas: Quilted Table Runner and PJs

$
0
0
Here's a bit of a change from me - some selfless sewing! Recently, I got a bit crafty and decided to make my Mum something super special for Christmas. Not only is she an awesome Mama, but next week I'll be travelling to Canada for the holidays and it will be my first Christmas away from home, so there was even more reason to make her a little keepsake. 

On a trip to Ray Stitch at the beginning of November I found some gorgeous festive fat quarters. At the time I wasn't quite sure what they were going to be, but I bought 4 anyway. I also added some extra designs from eBay to the mix.

After some deliberation, I decided to see if I could find a tutorial online for a quilted table runner. My Mum does a cracking Christmas dinner and her table always looks so beautiful. I also thought that by making something for the table, I'd still be there in spirit on Christmas Day.

I found this awesome easy tutorial called the '12 Days of Christmas Table Runner'.

And here's how mine turned out:


The tutorial suggests cutting out 27 5" squares, but I ended up cutting a few more to make my runner a bit longer. Once you have your squares, you sew them together in a 3 x 3 block and then cut that block in half horiztontally and vertically, until you end up with this block on the right.


I ordered some batting from eBay as well, and some festive backing fabric which is red with gold reindeers. This is my first quilting make, so I was a little unsure about certain aspects (the batting, what weight, what kind etc) but I am really, really happy with how it all turned out. I used basting spray to keep the patchwork, batting and backing together while I quilted the runner with long parallel stitches.


I finished the edges with red binding from Minerva Fabrics and even got my mitred corners right using this tutorial.


I am at my Mum's this weekend and we opened all our presents to each other. She loved the table runner and last night slept with it at the foot of the bed. Success!

My other Christmas sewing was two pyjama bottoms for my nephews. During my stay in Toronto in the summer I picked up some awesome Batman and Spiderman flannel on Queen Street destined to be fun PJ bottoms. I used Kwik Sew K3589 and had my Mum send me some quick measurements.

After pre-washing the fabric, I was so upset. They turned into bobble city! I was horrified. After some googling, turns out cheaper flannel can do this but you can pretty much rescue it using a pumice stone. It worked a treat - phew! (Just nobody tell my nephews I used my pumice stone on their new favourtie pj bottoms!) Has anyone else had this problem with flannel?

Here's how they turned out!


And of course, here they are being modelled by my gorgeous nephews today after our 'Christmas Day' dinner.

 I don't know what this pose is, but I LOVE it!

 Gorgeous George - such a darling inside and out

 If only my blog photos looked this good

Action shot and the 'present room' as he called it

I really enjoyed doing some selfless sewing! As soon as I get back from Canada I am starting back on a shirt and PJ bottoms for Mr S. I'm also more determined now to continue with my dream of making a full size quilt. I already found a pattern and began cutting out squares some months ago but it got relegated to my top shelf, so that's definitely a plan for the new year. 

I've had the most wonderful day with Mr S and my family. I'm so lucky and happy to belong to such wonderful people, they light up my life. And, they also eat and drink as much as me, especially tea, cheese and cadbury's biscuits. Who could want for more? While I go hunt out more cheese and pickled onions, tell me what Christmas sewing you have been doing?  

Minerva Blogger Network: a D&G style tweed dress

$
0
0
I really loved Dolce & Gabbana's A/W 2013-14 collection this year, particularly the inclusion of so much tweed and houndstooth. I loved the loose fit of some of the garments, such as the swinging coats and a short a-line dress, so much so that I decided to make my own version for my last Minerva make of 2013.

Here's the £730 version from Dolce & Gabbana. I love how understated this is; the fit is loose with an accentuated A-line, simple round neck and 3/4 sleeves.

(Source: FarFetch.com) 

Fortunately, I found some lovely tweed on Minerva's website and adapted a simple McCall's pattern (2401). I chose this pattern because not only did it offer the right neck line and sleeves that I wanted, but I love the fit of their patterns especially in the bust.

Here's how mine turned out!


To get this dress from the pattern I first decided on the length. I knew I wanted it short as per the D&G original and so I simply measured from the shoulder to my desired length and slashed the pattern (adding a decent hem allowance beforehand!).

I then added the A-line shape. You can choose how defined you want your A-line to be, but I went for a full Mary Quant flared shaping. After I made my dress I was a little worried that it was TOO flared and I'd take off like a kite with the slightest gust of wind, but I consulted my 1960s guru, Mama Delle, and she quickly reassured me that this was perfect and very Quant. Thanks Mama! To achieve the A-line, simply mark your flare from the existing side seam/hem corner and then draw a line up to just below the bust. You can then gently shape where it meets the side seam near the bust using a french curve or free-hand. 


When working with the tweed, I really took my time, especially when creating the darts. To begin with, I decided to keep the bust darts and the back (diamond) darts. The pattern does call for front waist (diamond) darts as well, but I omitted these in order to keep the loose shaping at the front. 

After cutting I removed the darts from the paper pattern, replaced the pattern over the fabric and thread-traced my darts using white thread. Thread tracing is a couture method used on delicate fabrics. You can just about see this here:


After cutting, I also stabilised the shoulder and neck seams by tacking silk organza to prevent any stretching. 

From that point onwards, sewing the dress was really easy and straightforward. This type of tweed from Minerva was a joy to work with and was very cooperative. Perhaps it got confused and thought it was actually going to be a real D&G dress, so behaved itself - sorry tweed, you're stuck with a Dixie Lou label for now.


For the zipper, I decided to a do a handpicked lapped zipper. I pressed the zip seams to the required 5/8", positioned the zip and used double thread coated in tailor's wax to stitch it in place. If you have never tried hand-sewing your zip, I highly recommend it. I not only find it really therapeutic, but I love the finished effect. Threads do a great tutorial here


The pattern doesn't call for lining, but I lined mine by making a complete second version of the dress in black polyester lining (also included in my Minerva kit), which I attached at the neck line. I did, however, still overlock the seams of the tweed as this stuff frays like there's no tomorrow. Even though the seams will not be on display, overlocking will increase the life of this dress. If you choose to line your dress, make you sure you clip your neck seam so that when you go to turn your dress, the neckline behaves itself and sits nicely for you - then you can pose like this! 


To finish, I hand stitched my lining to the zip tape, hemmed the dress and the sleeves, and hemmed the lining - also hand stitching it to the dress fabric. 

One thing I loved about the D&G advertising campaign for A/W 2013 was the drama! If you have a google you'll see lots of brilliant scenes like these:


So I thought I'd recreate a little Italian drama myself. Obviously, I was supposed to meet Don Draper for lunch, but me being so busy juggling my romances with George Peppard and Elvis, I got my dates mixed up and when I reached our rendezvous spot for a quick how's your father, he was nowhere to be seen. FML!

Oh. Don.

Okay, back to reality. I love this dress and it's super warm. It will probably make its debut at my big work event at the end of January in Amsterdam, which will be appropriate as it will be cold, cold andoh yeah more cold! If you fancy making this yourself, you can buy my kit on the Minerva website here.

Have you spied anything high-end on the catwalks and made your own version? 

New year, new Dixie Lou?

$
0
0
Well, maybe not a completely new Dixie Lou, but I am hopeful I can make some more positive changes in 2014. However, more of that later.

Firstly, Happy New Year everyone! As some of you know, I went away for Christmas to Canada and Arizona for New Year's. Despite missing my family lots and lots, I had a wonderful time away. I met up with my Toronto SpoolettesGillian, Catja, Sara and Andrea who all came to meet me for drinks and a cheeky tequila. We had such a laugh and I can't wait to see them again in the summer. Here's a few photos of us up to no good:

Toronto Spoolettes and me with a drink in my hand as usual

Catja and Gillian

Me, Sara and Andrea

Love this pic. Catja's food came with three VERY generous
helpings of salt, which we mistook for coconut

So what's new for 2014?

During my trip away and my sofa-bound days recovering from jet lag, I have thought a lot about the new year and what I want it to bring me. Sewing wise, I have read some inspiring blog posts, such as Rochelle's, about refining sewing output to fewer, yet better constructed & fitted garments that will be worn more frequently. I really like this approach and it's something I have been considering too.

Looking back to 2013, I think some of my projects were rushed, lacked focus, were too ambitious, or were hardly worn. This makes me sad, as one of my reasons for sewing is to not perpetuate the problems associated with disposable fashion. So, for my first sewing goal, I want to develop more of a focus to my sewing; define my personal style and create a sort of 'capsule' collection which adheres to that style, and one which I end up wearing far more frequently (my initial ideas are below). I am not putting a number on my output for 2014, but I am very much okay with it being a smaller number with the intention of all the makes being executed as professionally as possible...uhhhh don't look at me like that Don, I'm serious!


In terms of what I want to make, I am craving a long-term project. When I made my wedding dress in 2012, I loved how it was an extensive project carried out over approximately 6 months. I learnt how to work with delicate fabrics such as high-quality lace and satin, as well as couture techniques, which I have continued to use in regular sewing. I've been wanting a more 'studious' project and so my second sewing goal will be a Chanel style cardigan jacket. For Christmas, my in-laws got me Claire Shaeffer's new book, which I have been coveting since news of its release. I am beyond excited to start on this! I am undecided on my choice of boucle colour as yet, but initially I am thinking blacks & greys to ensure maximum wearage.


On completion expect some Coco style celebration!


One thing I should mention is that before I can get started on this, I have a promise to keep. At the end of last year, things got so hectic that all my sewing promises to Mr S went out the window. I have declared that January is his, so I'll be sewing his new shirt, boxer pants and PJ bottoms that he's been waiting for. We have all the fabric (especially some fun flannel from Toronto) and patterns, so hopefully these projects shouldn't take too long. Technically this should be sewing goal #1, but I can't be THAT selfless right? So, count this as my third sewing goal.

Speaking of jackets, I also have the Style Arc 'Ziggi' jacket as my fourth sewing goal, which, as far as first impressions go, I am crazy about. I am looking forward to taking my time working on this classic piece. The brunette loves her jacket so much her face dropped off!


A definite goal for 2014 is trousers. I am really fussy with trousers whether they are RTW or from a sewing pattern. There's a certain style of fit that I like, which I have only ever really got from a pair of Warehouse trousers I bought a few years ago. I like a cropped ankle with a slightly loose slim fit going up the leg - something like this from Whistles or Jaeger. My plan is to both draft a pair and use a pattern. I have both the Lola from Style Arc and Burda 6981 to have a crack at. So, make trousers my fifth sewing goal.


For my sixth sewing goal, I've noticed how much I like wearing shirts. I find them feminine and my best friend when I want to hide or disguise my bum-bum. I want to use my denim from Goldhawk Road to make a spring shirt, but I also want to make a couple of city chic shirts in lighter, silkier fabrics that will look stylish with trousers and/or jeans, oh and under my Chanel cardi of course. Get me!

My seventh sewing goal will be over-sized t-shirts. I wear these a lot but get tired of buying them (see disposable fashion comment above). I want to invest in better quality fabric to make my own lux versions of the over-sized tee. Greys, whites, nudes... my kind of palette to again pair with trousers and jeans.

In terms of dresses, I am sure I will make a few but right now there are not any particular styles I am craving. One dress I do want to make though, as my eighth sewing goal, is my frocktails dress for drinks and shenanigans with the Spoolettes. I have this gorgeous and unique printed lace from Minerva Crafts that I am dying to transform into the classic Vogue 8766 (you'll recognise this as the dress that Ann made on the Great British Sewing Bee):

I'm choosing the middle right for a hint to the 1960s. 

My ninth sewing goal is to make sure I have some sexy go-tos in my wardobe. Last year, I had a few awards ceremonies for work and I found that I was short of fancy dresses. Plus, there's the usual dates with Elvis that crop up from time to time, but I won't bore you with that up-coming schedule. On my list are By Hand Londo's Georgia and Anna. I really loved Fiona's silky version, so I would definitely be looking to make a vampy Anna as I like how it follows the rule of legs or chest - you can't do both - well unless you're Coco and your dress can show everything!

My tenth sewing goal is my quilt. It's my dream to make a full size quilt for our bedroom as a kind of heirloom that we can keep for years and years. Last year, I chose my pattern and collated all my fabric. I am using vintage fabric from Mr S' grandmother as well as lace/satin leftover from my wedding dress. I did start to cut out my squares but for some reason I stalled. After making Mama Delle a quilted table runner for Christmas, I definitely have more confidence in pursuing quilting and am going to treat this as my 'release' from dressmaking. I'll look forward to scheduling in some quilting time as a nice break from garment making.

I think that's about it for sewing goals. These are in no specific order but they are definitely an indication of the road I want to go down. I don't want to be drawn too much to random patterns, but instead want to stick firmly to my own personal style. AND, I want to take my time, not be concerned too much with having something to blog, but having something beautifully constructed to blog. We'll see how that goes :)

My kind of exercise

For my other goals in new year, some are the usual, others are more specific and important to me. Mostly, I want to look after myself more both physically and mentally, making the time to go to the gym, run, and walk just for the sole purpose of a nice walk, not because I need to get somewhere. I live right near Greenwich park and it's incredibly beautiful. I want to to schedule more walks and runs in the park, making sure I truly take in the view and the smells around me.

Last year, I had one of the most positive years I've had in a long time and I want to maintain the hard work I've put into self-development. I want to pursue more Mindfulness practice as well as yoga and relaxation. Sometimes, I drown myself with deadlines and even sewing becomes a pressure rather than my treasured hobby. So this year, I'll be embracing essential oils, baths, and some time in Hawaii with Don ;) Other goals include more reading, more film watching as well as learning something new. I am toying with either refreshing my German or undertaking a tailoring course, if I can find a suitable evening or weekend course. I'd even like to do some carpentry! Adult Education is our oyster people!

Phew...I'm exhausted...maybe I'll just have another cup of tea and some more Christmas chocolate before I start all this good stuff.

Happy New Year everyone and I wish you much sewing joy xx

Good things happen on Elvis' birthday

$
0
0
First off, happy birthday Elvis! Of course I'll be jumping out of a cake later and singing him Marilyn-style birthday wishes, as long as he doesn't take over and sing over me again. Honestly, EAP, butt out and just eat that fried banana and pb sandwich I made you!

Yes M'am!

To keep up with my resolutions, I took a late lunch today and went for a walk in Greenwich park. As I mentioned in my New Year's post, I live right near it and I have been a fool for not capitalising on this as much as I should.

On leaving my flat I decided that I'd slow down my pace and not think about an end point. I had an hour to just walk and take in the sights and get some inspiration. And boy, did it prove worthwhile.

*If you're not a fan of animals or greenery or prefer it when I mainly talk about sewing then it's cool, you're dismissed :) Otherwise, yey, let's love animals and parks.

As I was walking through the park, I heard some really obnoxious screeching. I looked up, expecting to find an angry crow or gull, but on closer inspection I saw two colourful birds. As I looked closer, I discovered that they were wild parakeets! I couldn't believe my luck at this spot, although at the time they were being a bit mean bullying a squirrel. However, it was cool to see these birds in Greenwich in January!

This is a bad picture as I just had my phone and London is, well, grey, but there they are!


Next up on my Dr Doolittle expedition, I ventured to Greenwich Park's deer enclosure. Yep, it has Red and Fallow deer. Usually, when I run past they're nowhere to be seen, but today they were all out. So fabulous.


As I stopped to take a picture, so many squirrels were coming up to me to see if I had some lunch. They're pretty tame as park inhabitants so I got some good photos. I really digged this guy's ombre fur colouring.


While I was taking a picture of him, I heard more rustling. Looking up I spotted a FIELD MOUSE! I was beyond excited. I watched him for ages, but couldn't take a photo for fear of scaring him away. If you google field mouse, you'll see they are the cutest things with big ears and big black eyes. What a treat to see.

My next treat was a big pack of dogs out playing. One of them was an Old English Sheepdog who was just adorable. I tried to chat to the dog walker, but she was disinterested, WHICH was a good thing because as I was stroking the sheepdog I said "awww you're the Durex dog". UK readers will immediately get my faux pas. The paint company, DULUX, always had an old English sheepdog on its advertisements. So yeah...mega cringe at basically calling this dog the condom dog.

I had such a great time in that one hour. I felt so inspired and the fresh air and slower pace did wonders to calm my mind and make room for some inspiration. I thought about my Chanel cardi, how I'll start that and possibly blog the entire process to eventually become a new menu tab on my blog; I felt motivated enough to decline the sofa's sweet charms tonight and instead start on a sewing project; I even felt the courage to start running again and am choosing tomorrow to get back out there. I have an awesome running book from the lovely Rehanon to help me on my way.

Thanks for reading a non-sewing post, but all these lovely things seemed too cool not to share...I'm sure normal service will resume soon!

Looking for that LBD? Vogue 1360 ain't half bad

$
0
0
It's my first official make of 2014 and my latest post for Minerva!

This time around I decided to make a wardrobe staple: the little black dress. January/February is the busiest time of year for my job and I have a lot of meetings as well as our huge annual exhibition in Amsterdam. So, I needed a little number that I could both work and play in. Office in the day, cocktails at night - you know how it goes, Spoolettes!

I chose Vogue 1360 as I liked the idea of making it in a ponte/double knit. Something soft and comfortable yet with some stability and minimal crease factor.

The dress has princess seams on back and front, a godet in the front skirt, and includes concealed zipper, lining and a back facing.

Now, because I chose to make my version in solid black you'll struggle to see the details here. Also, I've been so busy with work I had no time to schedule a photo shoot with Mr S, so we're on automatic and indoors here people. Hopefully you can still see why I love this dress.


Here are the deets:

I made this dress in Minerva's Roma ponte fabric. It's a heavy weight knit in a blend of polyester, rayon and spandex. I pre-washed it as normal and allowed it to dry naturally over my clothes airer. For tips, Carolyn has a short blog post on working with ponte here.

For the pattern, I used the measurements ON THE FLAT PATTERN and not the envelope. Following those, I used a size 12 on my bust and hips tapering into a 10 at the waist. I wanted my version of this dress to fit closer than the picture on the model.

I didn't bother to make a muslin and it was fine. The only correction I made was to the hip line. I shaved off approx 1/4" each side by just sewing a new hip line. I found the original hip line was too...well hippy and made me look wider. Ain't got time for that!


It took me some time to find the best needle for the job. I suffered at the evil witchery of skipped stitches...I swear I heard them laughing at me. In the end, my pack of Organ Super Stretch needles (size 90) did the job perfectly. Later skipped stitches! My tip here is, collect needles! Whenever you're out or making an online order just keep purchasing them packs, all sorts, even if you don't need them. One day, trust me, you will!

I used a 2.8 stitch length and a tension of about 2.5. I didn't change the pressure of the feet but I did use a walking foot with a straight stitch. Insert the concealed zip was easy peasy and left a lovely finish.


Overall, sewing this dress up was pretty straightforward. There are a few pattern pieces to contend with and the tricky godet section, but they weren't as bad as I thought. The pattern cover says this is 'Easy' but I would have to disagree. I think there are some awkward parts that could confuse or get a beginner into trouble - so take your time if you're inexperienced, but do enjoy working with ponte. It's so forgiving and helpful!

The lining is made out of stretch lining, like a tricot. I've never worked with this before and I definitely need practice at it. I had to change my needle again - this time to the super stretch size 70. I still got skipped stitches, but I discovered that slightly stretching the lining really helped prevent them.


One nice feature of this dress is the back facing made out of the ponte. I really like this part as it gives the dress a lovely, professional finish along the back neckline. It's easy to insert and is attached to the lining on a curved seam. I clipped mine to encourage neater turning. It is then hand stitched to the zip tape.


The lining is attached by the neckline and lower armholes first, understitched and then the fabric and lining shoulders are finished in one continuous seam. The lining is then hand stitched to the upper armholes to finish. 

I didn't alter the hem. I found the length was perfect for me as well as being the right length to wear in a professional environment. The hem is hand stitched while the lining is machine stitched and left to hang loose (you can tack it to the seams of the dress). 

The shoulders and armholes are my favourite feature of this dress. I love the shape and angle - it gives what could be a plain LBD a bit more of a chic appeal. The dress feels super comfortable to wear and the lining gives it that extra bit of luxury.


I'll be wearing my new LBD with red lipstick, tights, black heels and statement necklaces. I also tried it on my with my new trench coat and it looks fierce! Excited to pair up that sexy combo for sure.

If you fancy making yourself a little comfy LBD, then don't forget you can buy my kit here!

The Chanel Cardigan: choosing a pattern

$
0
0
As mentioned in my 'New Year, New Dixie Lou' post, one of my sewing resolutions for 2014 is to make a Chanel style cardigan. I have always loved this iconic jacket and want to make a version that is chic yet something I can depend on to throw over t-shirt and jeans. Anything that makes my trips to Sainsbury's a little less banal, dahlings!

To help me on my way I am using Claire Shaeffer's new book, The Couture Cardigan Jacket. I got this for Christmas and it's a beautiful book. I'm a huge fan of anything that comes from the mouths of Shaeffer and Susan Khalje and have spent a small fortune on their publications. When making my wedding dress, I paid a crazy amount for Khalje's out-of-print Bridal Couture, and it now sits smugly on my shelf barely talking to the other books.

Shaeffer's new book really is fantastic. It not only offers an insight into the world of Chanel construction, but also comes with an instructional DVD. I'll be sure to reference it a lot in my project, so you can ascertain if this is something you'd like to buy. But in the meantime, here's some buttonhole goodness from page 56.


My first task is to choose a pattern. In her book, Claire suggests her own Vogue pattern, V8804. As I've been wanting to do this project for some time, I had already selected a pattern before I received the book. But, no biggy, I ordered V7975, which I think is pretty similar.

I am going to choose option B. I like the length and it has the features Claire suggests are crucial to the Chanel cardi: two-piece sleeve, princess seams, jewel neckline and patch pockets.

I am going to start on my muslin asap and in the meantime my next Chanel Cardigan post will share my fabric hunt. As a vegetarian, I won't be using traditional wool or boucle, but will be looking to source some synthetic/cotton tweed to do the job. This means my options are limited but they're not entirely rubbish either. I think I may have found something quite special... until next time!

As soon as you set foot on a yacht you belong to some man, 
not to yourself, and you die of boredom.
Coco Chanel 

Blogbatical

$
0
0
Guys...agghhhh I thought I could squeeze in a make or two before I hit Amsterdam this Saturday. I overestimated a number of things, mainly my time and motivation. Work has been sucking me dry and not in a cool Vampire Lestat kind of way.

So, I'm off to the Dam for a week for work and it's going to be quite relentless, BUT I'm gonna try and maintain my loyal service to you all by Instagraming and Tweeting cocktails, wines, food (most probably cheese as that's all this veggie usually gets) and any other fun I may get dragged into.

When I get back, I promise to sew something!


Chanel Cardigan progress: it's a slow burner people

$
0
0
Well, I'm back from my crazy work week in Amsterdam and more importantly back on the sewing saddle!

Giddy up, I am even juggling projects.

First up is my progress on my big 2014 couture project, the Chanel Cardigan. As you'll see from my previous post, my aspiration this year is to work on one long-term couture project. I've always wanted a Chanel style cardigan/jacket and, with the release of Claire Shaeffer's awesome new book, there was no excuse but to take the plunge.

So far, I have selected my pattern: Vogue 7975 (I'm doing view B). Claire actually suggests her own pattern, but in the complimentary DVD that comes with her book, she does also recommend this one. Win!

My next job is fabric. To begin with, I am just focusing on the outer fabric. I'll tackle the trims and lining afterwards. Even though Claire recommends you think about everything altogether, my brain just won't work like that; I need the outer shell first then I can shimmy onto shiny linings and trims, or
'gimps' as she calls them. LAWLZ!

What makes fabric buying difficult for me is obviously the composition. I am vegetarian and passionate about animal welfare - which makes for this particular project difficult as the Chanel cardigan is typically made from tweed/wool blends. I won't go into horrible details, but seen as I cannot be sure of the welfare of the animals in the production of wool, I'm opting for man-made materials, yet this is not so easy.

However! Fret not readers, I've come up trumps with Linton Tweeds. Yep, THE Linton Tweeds, official supplier to Chanel. They actually have a whole range of non-wool fabrics that are a blend of cotton/viscose/and poly fabrics. I ordered some samples and received a whole batch:


I narrowed down my selection to four. Here are the three runners up:


The fabric on the left is a close contender as it reminds me of the Asteroids game - anyone?

The winner however is this lovely multi-coloured blend of bold and pastel colours in a textured weave. Isn't it pretty? It has a very subtle metallic silver thread, which gives it a little oooh yeaaah! I need more colour in my wardrobe and I think a cardigan in this material could make for a timeless piece perfect in any season. It's made of 75% viscose and 25% cotton, yet it feels pretty similar to its wool-based contemporaries. It retails at £26 p/m, which I think is pretty good value; it will total at just over £50 as I only need a couple of metres for this project.


This weekend I traced and cut my muslin pieces. I am now in the middle of marking all pattern pieces with seam and grain lines ready to sew up and begin the fitting process. I did this when I made my wedding dress (as per Susan Khalje's advice in Bridal Couture) and although it's time consuming, it's so worth it when assessing fitting alterations.

How much time do you spend on muslins and fitting?

Dolly Clackett is getting married! Come sewalong!

$
0
0
I'm so excited to post about this today! Get ready for some love people.

Some time ago Sarah from Rhinestones and Telephones contacted me about a fantastic sewing contest she was planning as a wedding gift to the wonderful and unique, Roisin (Dolly Clackett Blogspot). If you don't already know, Roisin and her amazing partner Nic are getting married this year. I am so happy and excited for two genuinely fantastic people whom, I am beyond pleased to say, are now true, real-life and hopefully life-long friends.

Sarah's brilliant idea is the Sew Dolly Clackett contest.


Basically, in order to enter, contestants must sew a dress in true Dolly Clackett style from February 23 to April 23 and upload it into the contest Flickr group.  Roisin will pick the winners and announce them shortly after the contest finishes.

How fun is this? And to top it off, Sarah has secured some fabulous prizes for the contest:


  • £50 gift voucher for Berylune
  • By Hand London Anna and Elisalex patterns
  • Christine Haynes Emery pattern 
  • Colette Patterns pattern of your choice
  • $75 Hart's Fabric gift certificate 
  • Sewaholic pattern of your choice


So, come on #Spoolettes, get your thinking caps on, hop over to Roisin's blog and get some inspiration for this contest. I am without doubt taking part; Roisin is now a very dear friend of mine who makes me smile and laugh nearly everyday with our mutual obsession for all things Alan Partridge and Silence of the Lambs. There's not many people I have got drunk and tuck-danced with in my hallway. I guess, just these things alone pretty much sum up how cool it is to find such a great likeminded soul. Roisin, I love you, in a way.

From Roisin's blog: Happy Valentine's Day, No-one! Emery dress

I can't wait to see what you all make...mega congratulations to Roisin and Nic again. I'm so happy I'm going to dance.


Uh-uh..no photos!

Better late than never: Grunge November and the sweet smell of Eddie's shirt

$
0
0
Towards the end of last year, my lovely friend Gillian suggested a Grunge November sewalong. To say I'm a little fond of all things Pearl Jam, Seattle and Subpop is an understatement. Gillian had barely sent her email before I jumped all over it with my scuffed Docs and ripped tights - count me in Toronto sister, I'm channeling back to 1993 RIGHT NOW and drafting a plaid shirt.

Okay okay...there's a slight problem here right? It's now February and fireworks and Christmas are but a hazy blur in the background. To be fair, I had time management issues, dates with Don, work, a trip to Canada and the general frivolity of being a Szabo to contend with. But, I'm back and my sewing mojo is cooking on gas with my first proper make of 2014 being what is now my most beloved plaid shirt.

For the photos and styling, I decided to go with one of my favourite grunge princesses of the time, Janet Livermore from the film Singles, played by the ageless Bridget Fonda (she's now 50, WTF?).

Janet outside the Duplex where I so badly
wanted to live

Me outside the Chez Szabo 'duplex'. Pattern is my own and 
fabric is a brushed cotton from Calico Lane 


When I first saw Singles, I was 13 and life was a daily torment of teenage angst, buying Kerrang! and plotting my escape and life in Seattle with my best friend Amanda. These were the days when MTV was great and you could turn it on at any time and see Guns N Roses or Brett Michaels singing about roses and thorns. One day, bored, I turned on the TV and watched a black & white video with hot, sweaty, plaid-soaked men crowd surfing. Immediately, I needed to know who this was! My hormones demanded it. The cheekbones of the lead singer alone sent my adolescent world spiralling. 

It was Pearl Jam's 'Alive' video and the cheekbones belonged to the one and only Eddie Vedder. Instantly, my little world changed. 


From that day on, all I remember is that life revolved around Pearl Jam. My room became a shrine, my pocket-money went on music, magazines and my evenings were spent writing endless letters to Amanda (that I would give to her the next day at school, even though we'd spend the whole day together!) about our fantasy life as Eddie and Stone's girlfriends.


Amanda and I told everyone we'd get to Seattle one day, and all I wanted was to work in a coffee shop dating a guy that wore tube socks and had long hair.... okay this hasn't happened but Mr Szabo does wear the socks and Amanda and I have got as far as Vegas and Phoenix together. It's only a matter of time. 

State of love and plaid matching

For this shirt, I drafted my own pattern. I'm beyond pleased with how it's turned out. It has a button placket (cut on the bias), collar, collar stand, cuffs and sleeve plackets. The whole shiz! 

I matched the plaid and flat felled all seams (except armhole). This shirt is truly a testament of my love to grunge.

Bias cut yoke oh yeah I like you

I ran into a problem at the end however. I had completely forgot to stay-stitch the raw edges on my neckline and the whole thing had pretty much stretched to that of a man's neck size. Doh! I was left with a perfect fitting shirt but with a man's neck size - holy pearl jam I was upset. HOWEVER, this is when Twitter comes and hugs you and spoon-feeds you melted chocolate and peanut butter cups. Some gorgeous people (you know who you are) helped me realise that wait! What are you talking about, Clare? This isn't my shirt - this shirt I picked up off of Eddie's floor one morning after a crazy night of writing songs and making out, AND it's nothing but a repair job that when finished, I'd be rocking as boyfriend-thrift-chic. RIGHT, that's made me happier!


So I continued finishing the shirt and I am so in love with it. The brushed cotton feels incredible and when wearing it over a t-shirt, it really doesn't show the man-collar. Plus, it looks so good when I am hanging out with my boyfriend and his band. 

Thanks Steffen Horak for taking this pic :)

Buttoned up, I think the shirt looks okay - I mean how can you not be distracted by that front plaid matching? I am also pleased with my top-stitching on this shirt, especially the collar points. Normally my top-stitching looks a bit drunk (knowing me, probably is!) but if you're struggling to stitch those points try using a walking foot, I found it really helped grip onto those pesky corners. 

Moody album back cover. Yeah, I dated 
Layne Staley, so what?

Here's a little proof of how much I love(d) Pearl Jam. I joined the Ten Club way back in 1993 and my friend Thomas (hi Thomas!) bought me Ten on cassette off of one of the US air bases near where we lived. I was so happy because it meant my version was actually American, as if that made it more authentic somehow! HA!


So that's Grunge Novebruary. I'd like to dedicate this post to one of my favourite people in the entire world, my bestest friend Amanda. We never get to see each other as she lives in Utah, but she means the world to me and there's no Pearl Jam without her. 

<Playlist: Chloe Dancer/Crown of Thorns - Mother Love Bone>

Switchblade sister: The Rigel Bomber

$
0
0
My eyes are the size of raisins, I am a palish grey in colour...guys I haven't seen daylight as I have been so busy sewing some goodness for my trip to NYC on Wednesday. Sorry Roisin, I forgot to tell you!

I had so many plans of things to make but after getting back from a work trip to Munich, time was limited. I had a chat with Elvis in the bathroom (I'm basically like Christian Slater in True Romance) and he said "honey, you got three priorities: make that rubberneckin' Rigel Bomber, that hot potato Ailakki Jumpsuit and me a grilled peanut butter and banana sandwich". Never one to argue with my  boyfriend, that's what I've done.

Sew that bomber, baby

First up is the awesome Rigel Bomber by Papercut Patterns. It's my first pattern make from this company and I am in love. Bomber jackets are on trend right now, especially in a floral print a la Liberty, and after spying lots of fantastic versions doing the blog rounds, I knew I had to make this. But, for me, I had the most special fabric in mind for the job. 

My husband's Grandmother was a prolific seamstress and had an epic collection of fabric dating from the 1950s to recent years. Luckily, I got to inherit some of her treasure. For this project, I went for my vintage 'posh ladies' that I have been hoarding for ages. Finally, they found their destiny. 

Bad hair day means cool new hat day (thanks Rehanon
for the inspiration chick)

Isn't she cool? Here are the details of the make...

I cut an XS. I read reviews of other makes and checked the final measurements. I knew I wanted a more snug 'authentic' bomber jacket, so went with the smaller size. The fit is perfect zipped up or left loose. 

Some reviews mentioned that the sleeves came up on the short size. I added an extra inch to the length, which are pretty perfect, but next time I think I will add a little more. 

Did someone order the Bananarama tribute band?

Now, my next task was making this NYC appropriate. Checking the weather, it's safe to say that Manhattan is not enjoying the same Spring weather that we've got right now. It sounds pretty cold, so making this jacket as per instructions with no lining is not going to warm the smallest of cockles! Also, reviews have said this jacket is best with a lining anyway, unless you don't mind seeing messy innards (pocket flaps, guts of the welt pocket, seams etc). That shit would drive me crazy so I decided to line my jacket with some very pretty flannel I picked up in Toronto at Christmas. I was saving this for PJs, but sod it - this bomber wants me to take care of business. 


As you can see, I kept the original facing piece but attached this to the flannel lining. I decided to do this as, when wearing the jacket unzipped, seeing the facing looks just that bit nicer and professional than the contrasting lining. To do this, I matched the facing pattern piece to the front bodice and drew around it. I then cut this piece away. From there on, I measured the width and deducted it from the top of the other pieces (raglan sleeve, back). I added a 1/2" seam allowance to the new lining pieces in order to attach them to the facing. I then stitched the lining as normal and then stitched to the facing. Voila! The finished effect is a super snug bomber jacket, I loves it!


Can I also say, I have successfully done my first welt pocket. High five! This wasn't as bad as I thought it would be. I practiced first with scraps of the shell fabric. This was a great move as I could see exactly where I went wrong. My second attempt on the real thing worked out great. My advice is to make sure your markings from the pattern piece are super accurate and baste/tack as you go. It's more time-consuming but worth it.

I bought the black ribbing for the waistband, neck and cuffs from Vends in the UK. It's a really good quality and sewed like a dream. The zip is my favourite feature. I found this on eBay and thought it had a cool art deco style look to it, which suited the fabric perfectly. 


I've never worked with an open-ended zip before, but it was surprisingly easy. I love that it comes apart so you can work on each side without getting in a twist. With this in mind, though, it's important to keep checking that you have attached both zip pieces accurately and that they match up. Check, check and then check again. 

Also, when attaching the neckband, really strive for accuracy and test how the zip will look before you stitch it. The meeting of the ends of the neckband when the zip is done up will notice if they're uneven. It's worth re-doing a few times to get a good finish.


I had a couple of issues with the bottom of the front bodice, which meets the ribbed hem, but that was entirely my fault for not thinking through properly how I would attach the lining. I know where I went wrong, so this will be something I'll do better next time. 


I am so pleased with this make and can't wait to rock it in New York. Above I'm teaming it with my favourite Whistles boyfriend jeans, baby pink 3-hole Docs and my new black hat from TopShop. I'm back in the 80s for this shoot, but it's nice here, John Cusack is Lloyd Dobler. 

As for Papercut Patterns, I am so impressed. The packaging, instructions and illustrations are all brilliant. I don't have a single complaint and will definitely consider making more from their range. And I'll be making another bomber, probably floral, for the warmer months. It beats a boring cardi!

<Playlist: Rubberneckin' - Elvis Presley>

The Moody Blue Jumpsuit

$
0
0
I'm so fed up of sewing and embroidering jumpsuits for Elvis (seriously, how many sequins and studs does this one Eagle really need dude?!) I decided to take a break and sew my own. He's sulking in the Jungle Room with a milkshake, but I gave him some karate films and promised to name my jumpsuit after one of his songs.

For ages I couldn't find a good jumpsuit pattern until Named came along and set all our hearts on fire with their cool and chic pattern collections.

I've had my eye on the Ailakki jumpsuit for some time but never got round to ordering it or even having  an occasion to wear it, but with NYC approaching, I thought well if there's ever a time to knock out a jumpsuit, it's for drinking cocktails in Manhattan right?!


The fabric is a navy/tealish blue cotton moleskin that I got from Goldhawk Road. This is from my favourite shop, Fabric House. I love Rashid and always have a chat with him when I pop in. He was the guy who sold me my wedding lace, so he'll always be a bit special to me and get my money. He let me have this moleskin for £7 p/metre.

Size wise, I used the 12/14 pattern and cut the smaller of the sizes. I made a muslin first from a medium-weight calico. The fit was near perfect first attempt apart from the zip, which was pulling a little taught lengthwise. After some deliberation I decided to try altering the shoulders first. I think most books, Threads etc, always suggest starting with shoulder alterations, and seen as I am quite 'blessed' in the broad shoulders area, this seemed like the solution to me. I ended up adding over an inch extra to the front shoulders, but it completely solved the problem. In doing so I just had to nip in the side seams about 3/8" on both front and back.


I reckon next time, I could go down to the 10 but I erred on the side of caution because of the thicker fabric. The result is quite a nice relaxed fit, which will be perfect as I start doing Elvis karate kicks after a jug of Margarita.

The pattern is labelled as 'advanced' but I definitely think this is easier. The instructions and illustrations are really good and make perfect sense. The only change I would make is the construction order of the pockets. The instructions suggest sewing up the trouser side seams first leaving a 'hole' to insert the pockets. The pockets in this garment are really cool. They have a little panel made from the main fabric, which connects to the back trouser leg. Therefore, when you stick your hand in your pants, people don't see the lining so much. Neat!


I made the pockets as instructed, but then added them to the trouser legs BEFORE sewing the side seam as normal - that is, stitch one to the front trouser side seam, one to the back side seam and then sew from the waist down to the start of the pocket, around the pocket, and then all the way down to the trouser hem. As I reach the start and end of the pockets, I decrease my stitch length to about 1 for strength.

The wrap front of the bodice with peep hole makes your scratch your head a little bit (especially when sewing shoulder seams) but the illustrations are great and as long as you follow them, you won't have any problems.

The pattern uses a 3/8" seam allowance all over including the zip. I finished my leg seams first on my overlocker, before sewing them up with the pockets. The bodice is fully lined and I used a basic maroon polyester, which would be lightweight against the moleskin. The trousers have front pleats, back darts whereas the bodice just has wide front darts. The zipper used is a standard dress zip as you don't need to conceal it - although I guess you could.


The waistband is faced with the moleskin and connects the front wrap pieces. Make sure you mark your notches on the waistband correctly as you'll need them to ensure you centre the trousers under the peep-hole in the bodice.


The only other change I made was to taper the legs in a bit. The ankle width was a bit too wide and flappy for my liking, so I just tapered the trouser side seams in by just under 3/8". The leg length was spot on for me and I am about 5'9.

So there you have it, my Moody Blue jumpsuit. I don't think Mr Szabo is a fan. His theory: "Girls love jumpsuits, but men don't find them very flattering." What do you think? Would you consider making this?

The money shot
Viewing all 85 articles
Browse latest View live